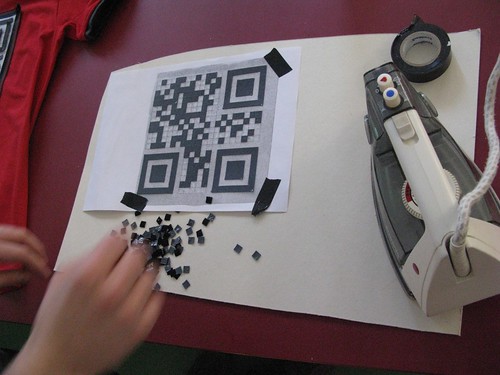
You will need to have QR T-shirt package from Kitchen Budapest for making a KIBU styled QR T-shirt. If you don't have one, and are interested in or you would like to have a QR Code T-Shirt please send us an email for this address: qrt-shirt@kitchenbudapest.hu.

(To read the QR code you will need to install decoder application to your computer or mobile device. You can find help on our T-shirt message project page under "Resources".)
For example, to generate a 25x25 pixel QR code you have to use a text containing more than 11 but less than 20 letters.
Here is a help:
21x21 QR code:      0-11  letters
25x25 QR code:      11-20 letters

a.) If you managed to generate your QR code, the next step is that you will have to reproduce it manually to have an ironable sticker.
Now you have to use the QR code sample sticker found in your package, and remove the exra pixels from it. Be careful, for you will remove pixels form the back side of the sticker, you have to think mirrored. You also have to take care to remove pixels from the white areas of the QR code.One strategy to avoid mistakes to print the QR code mirrored and remove the pixels while keeping one eye on the print.
Even better strategy is to print the QR code in the same size as the sticker, then temporary fasten the print to the sticker by tapes, and then use a pin to punch the white areas systematically to make visible holes on the sticker sheet. After doing this you can easily remove the punched parts from the sheet.
Don't trouble if you made a couple of mistakes - the QR decoders can handle some errors in the code.
b.) If you have your QR sticker you have to transfer on the T-shirt by ironing it. You will have to follow these instructions for best result:
1. Put the sticker sheet onto the T-shirt with the plastic glossy side up.
2. Put a sheet of tracing paper or fabric on the top of the transfer sheet to avoid the iron being contacted directly with the plastic side of the transfer sheet.
3. Iron it for 15-20 second by 160°C degrees with an average pressure on the sheet.
4. Wait for a couple of minutes for the sheet to get cold.
5. Remove the plastic film of the transfer sheet.
Your T-shirt you made in this way is durable and washable
at a maximum of 60°C degrees.
6. You are ready... smile and wear it!

Last step: customise your geek avatar!
Using the spare black pixels you removed from the transfer sheet you can customise the "geek" avatar printed on the T-shirt. For a basic idea you can make a feminin or masculin character as you can see on the picture below.


